Displaying Images
The Setup View
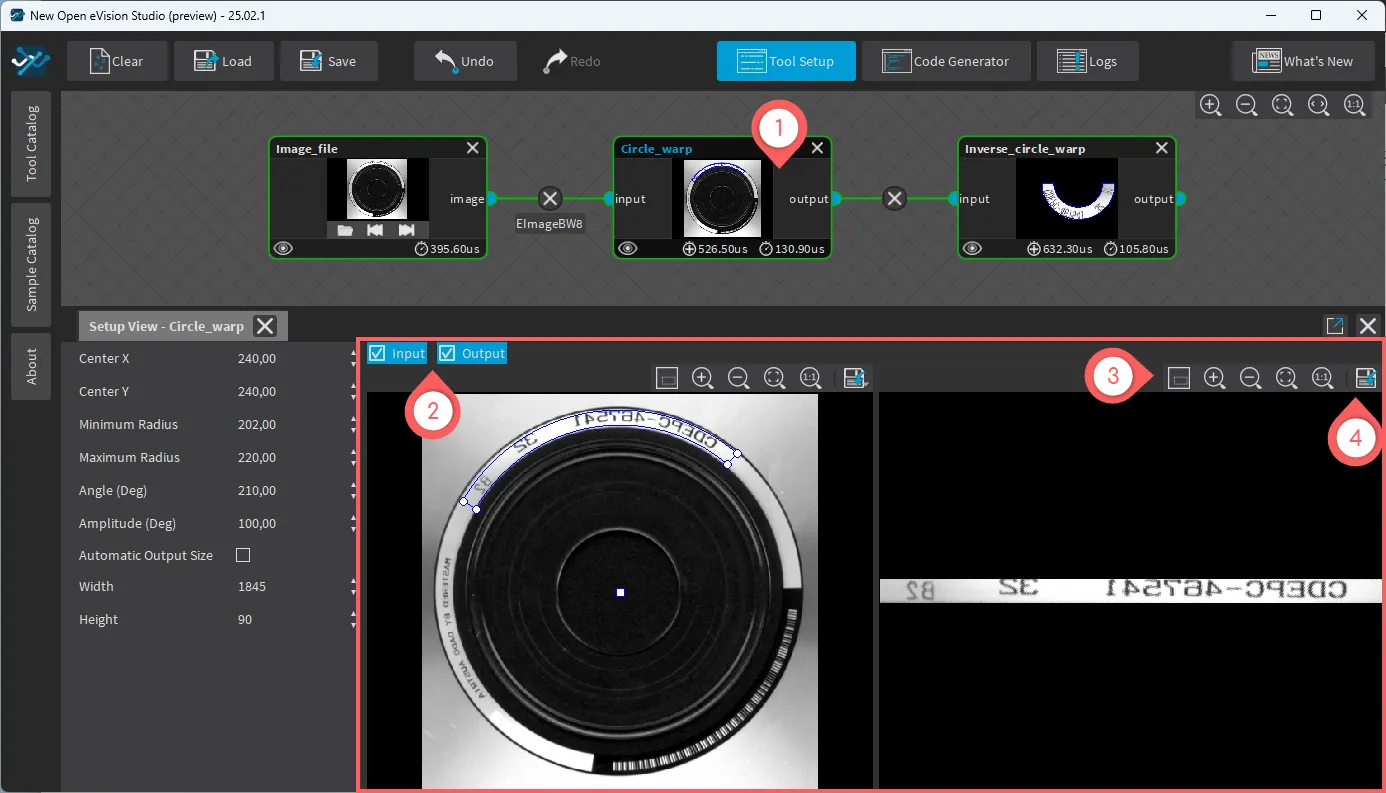
Its
Setup Viewopens
One or more images may show.
If there are multiple images, click on the blue check boxes to show or hide these images.
Use the zoom and adjustment buttons.
Click on the
 button.
The Image Pane(s)
You can display the result image of any tool in separate image panes:
An image pane always displays the result image of the corresponding tool.
The result image may be different from the image displayed in the
Setup View.You cannot configure a result image.
You can display the result image from multiple tools at the same time.
The images stay displayed independently of the currently selected tool.
Hint
When you adjust a tool, use these image panes to easily keep an eye on the effect of your changes on the other tools of your graph.
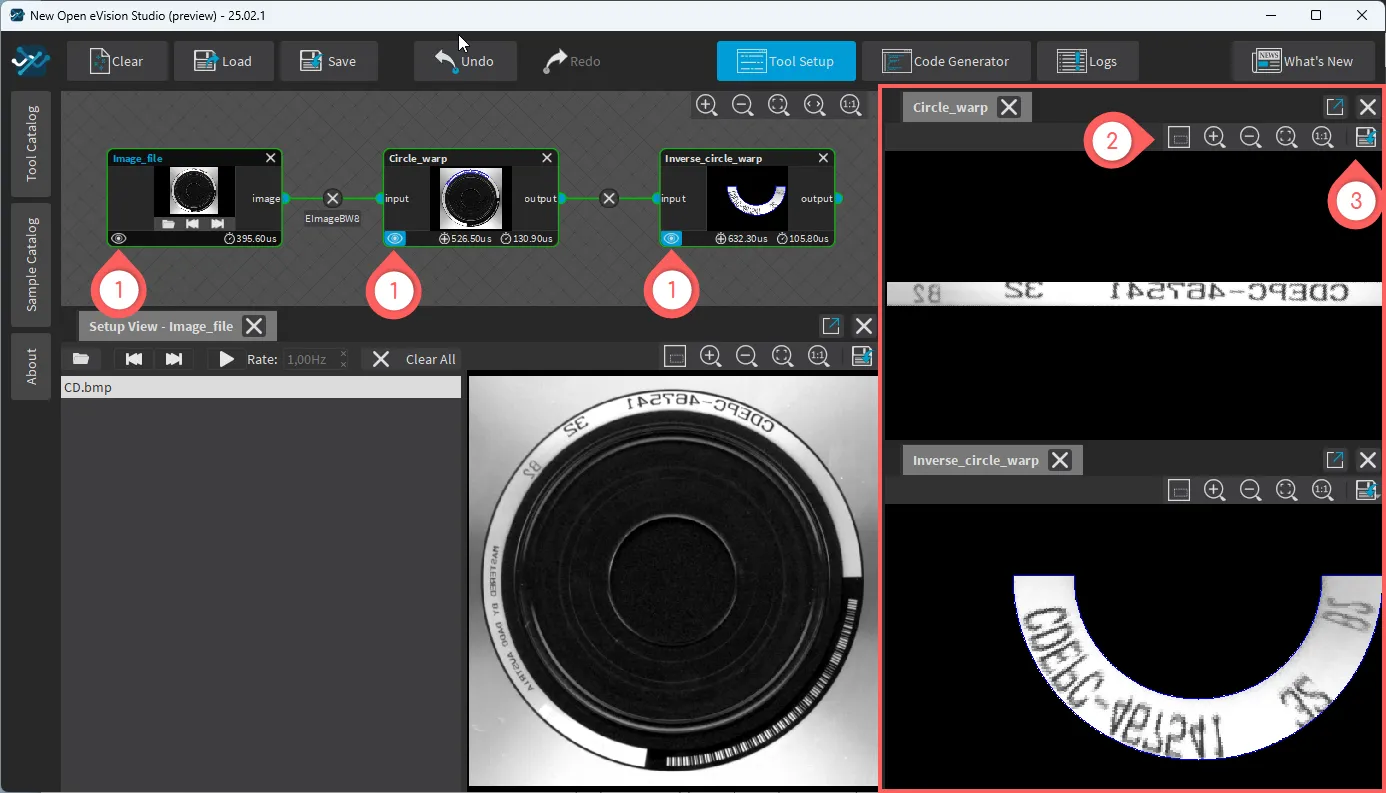
Will open its result image.
This additional view pane stays open even when you select another tool.
One or more images may show.
If there are multiple images, click on the blue check boxes to show or hide these images.
Use the zoom and adjustment buttons.
Click on the
button.
See also
By default, image panes are displayed in the right part of the window. To move and organize them on your screen, see The Main Interface.
The Zoom Buttons
In 2D image viewers, you can control the zoom of the image:
 : view parent.
 : zoom in (up to the 1:1 size).
 : zoom out.
 : resize to display the whole graph (up to the 1:1 size).
 : zoom the 1:1 size.
The 3D Adjustment Buttons
In 3D image viewers, you can control the display of the 3D image rendering:
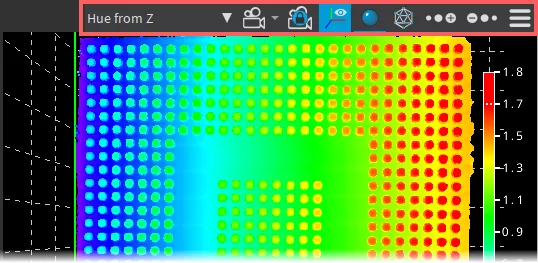
 : select the color scale reference.
 : point the camera towards an axis (Z by default).
 : point the camera towards an axis (Z by default).
 : show or hide the axis.
 : enable or disable the Eye-Dome-Lighting (EDL) shading.
 : enable or disable the display of the wire frame triangles.
 : increase or decrease the size of the points.
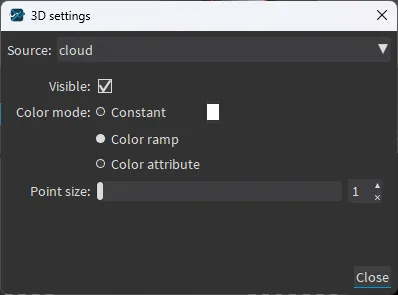
 : open the 3D Viewer settings window to further configure the 3D image rendering.