Managing the Dataset and the Annotations
A dataset is represented by an object of the EDataset .NET Python type.
A dataset is a collection of images with ground truth annotations. The ground truth annotations depends on the type of tool that you want to use:
The ground truth annotation for EasyClassify and EasySegment Unsupervised is a label.
The ground truth annotation for EasySegment Supervised is a segmentation map: an image where each pixel has a segmentation label.
The ground truth annotation for EasyLocate is a collection of objects. An object is a point or a bounding box with an object label.
Note
By default, an image has no ground truth annotation of any type.
Capturing Images for Deep Learning tools
The capture conditions must be as close as possible to the production conditions.
Preferably, all images should have the same resolution.
The number of images needed to obtain a good performance depends on the complexity of the task and the tool used.
With EasyClassify, you can train with as few as 10 images per label. Nevertheless, complex tasks may require more than 100 images per label.
With EasySegment Unsupervised, you can use less than 10 “good” images. Nevertheless, complex tasks may require more than 100 “good” images.
With EasySegment Supervised, the required number of images depends on the size and the number of elements to segment in each image. You can use as few as 10 elements per label. Nevertheless, complex tasks may require more than 100 elements per label.
With EasyLocate, the number of images depends on the number of objects/defects in the images. You can use as few as 10 objects per label. Nevertheless, complex tasks may require more than 100 objects per label.
Refer to the Specifications for constraints on the resolution and number of images.
Handling Images
Adding Images
You can add image files or eVision image object to a dataset:
The supported image file types are:
PNG
TIFF
JPEG
BMP
J2K
The supported eVision image object types are:
The supported image size depends on the type of the deep learning tool:
EasyClassify and EasyLocate require that all images have the same size. Images that do not have the size configured for the tool are automatically resized before being processed by the neural network.
EasySegment splits images into patches. As such, the tools can process images of different size and the images are processed at their native resolution.
In all cases, your dataset should cover the variability of sizes that you want to process in production.
Deep Learning Studio
Add image files (PNG, TIFF, JPEG, BMP and J2K types) to your datasets in one of the following ways:
Click on the
Add imagesbutton to add images without any label nor segmentation.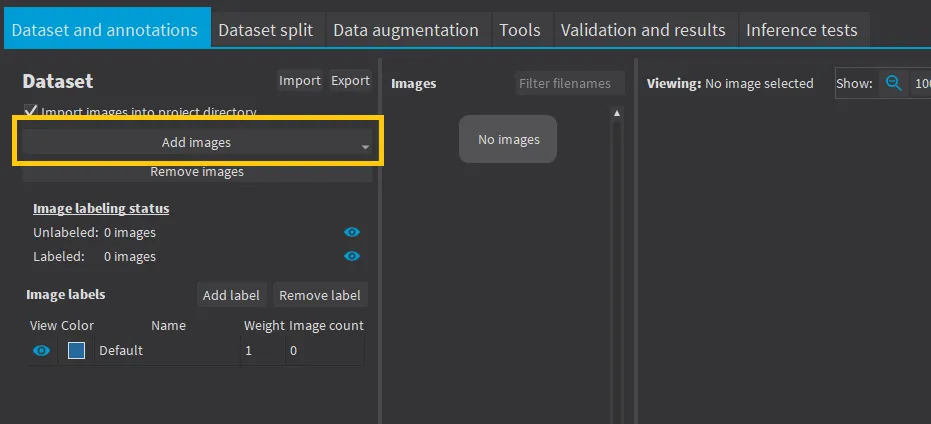
Adding images. For EasyClassify or EasySegment Unsupervised
right-click on an image label and click
Add images to labelorAdd folder to labelto directly associate these images to the label.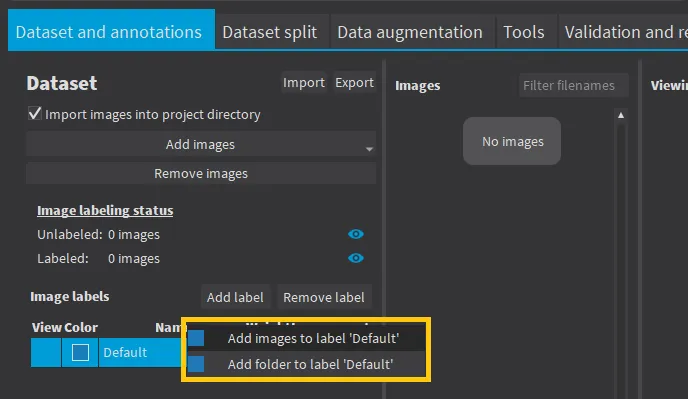
Adding images to a label directly/ Drag and drop your files directly on an image label to directly associate these images to the label.
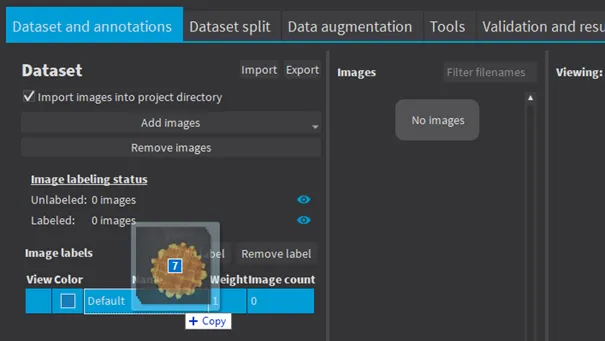
Adding images through drag and drop.
Note
If there is an .txt or .xml file with the same filename as the image next to it, Deep Learning Studio tries to load these files as YOLO TXT or PASCAL VOC XML annotations.
API
Add a single image to a
EDataset.NET Python, in the following ways:EDataset::AddImage.NET Python with the path toward an image file or with an eVision image object.You can specify a classification label to immediately associate the image with the label. Otherwise, the image is unlabeled.
The method returns the index of the image in the dataset. This index is equal to
EDataset::GetNumImages.NET Python- 1and can be used to add, remove or modify the annotation for that image afterwards.
Add several image files with the
EDataset::AddImages.NET Python method. The method takes afilterargument which is aglobpattern with the wildcard characters:*means “zero or more characters”?means “a single character”
For example,
EDataset::AddImages("*good*.png", "good")adds all PNG image files that contain “good” in their filename.This method returns the number of images that were added to the dataset.
ROI
With image files, you can use an ROI (region of interest) to crop an image or a whole dataset to a rectangular area aligned with the axis.
Note
All the ground truth annotations (EasySegment Supervised or EasyLocate) located outside the region of interest are lost.
Deep Learning Studio
To change the ROI:
Select an image from the dataset.
Click on the
ROIbutton (ALT+I).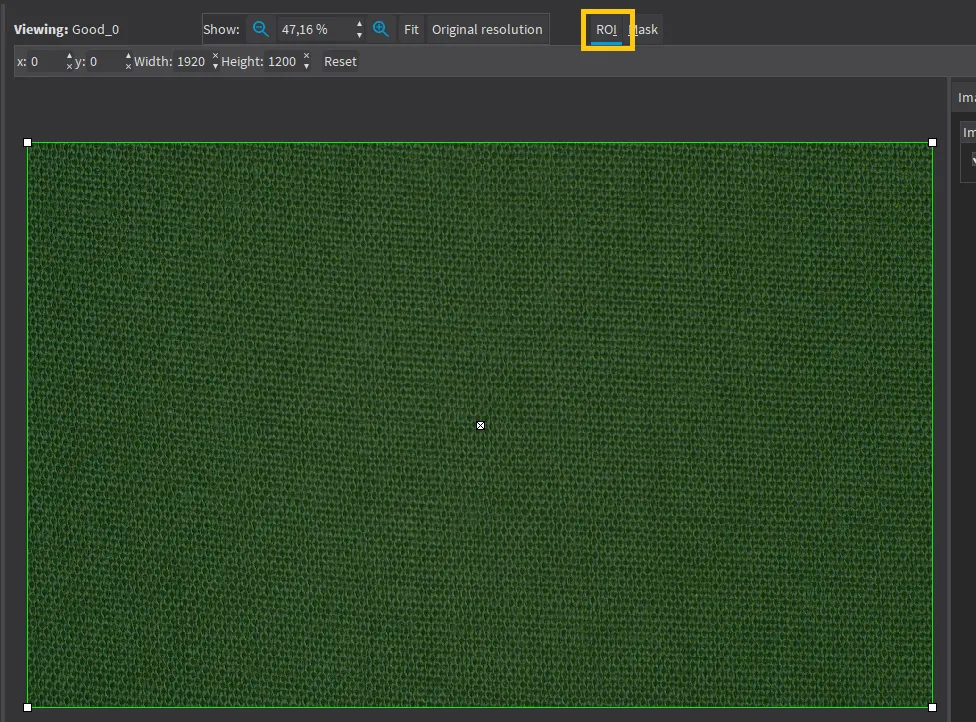
ROI edition. Drag the ROI green box, or directly set the ROI origin (
xandy),WidthandHeight.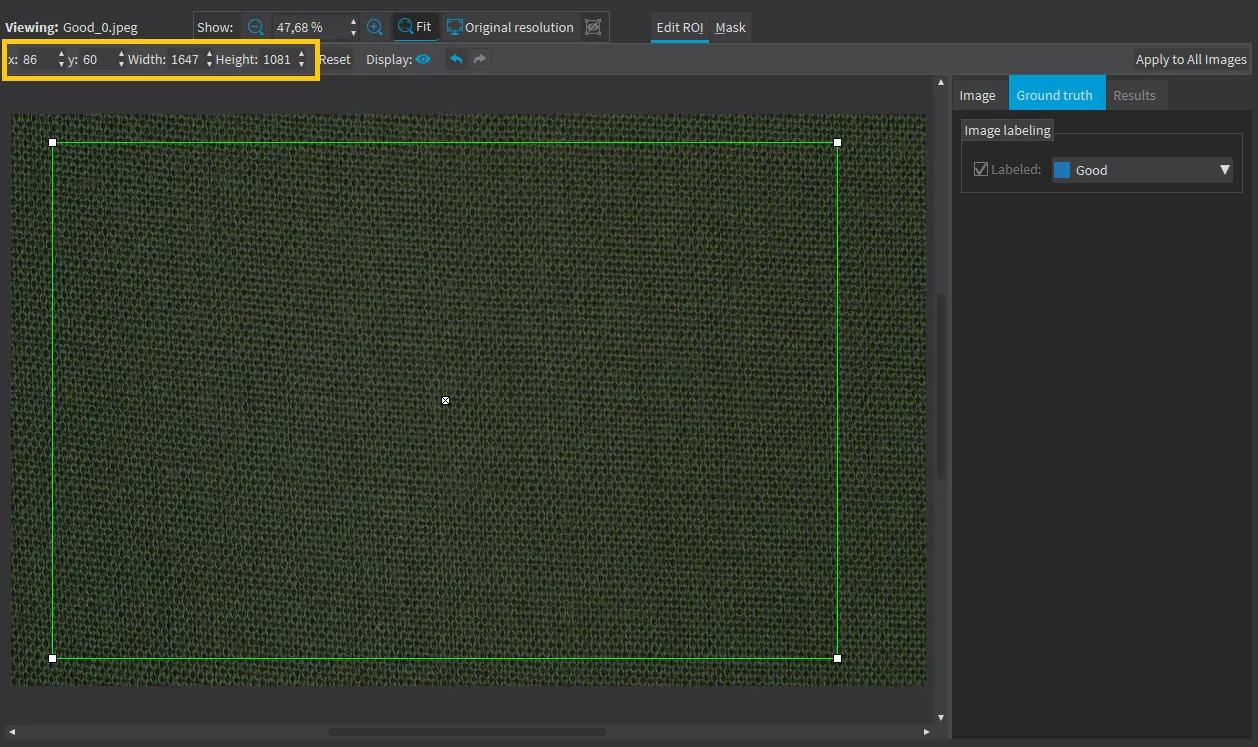
ROI edition.
To set the same ROI for all the images of the dataset:
Set the ROI for one of the image.
Click on the
Apply to All Imagesbutton (CTRL+SHIFT+A).
Apply ROI to all images.
To visualize the ROI within its parent image, click on the
 button.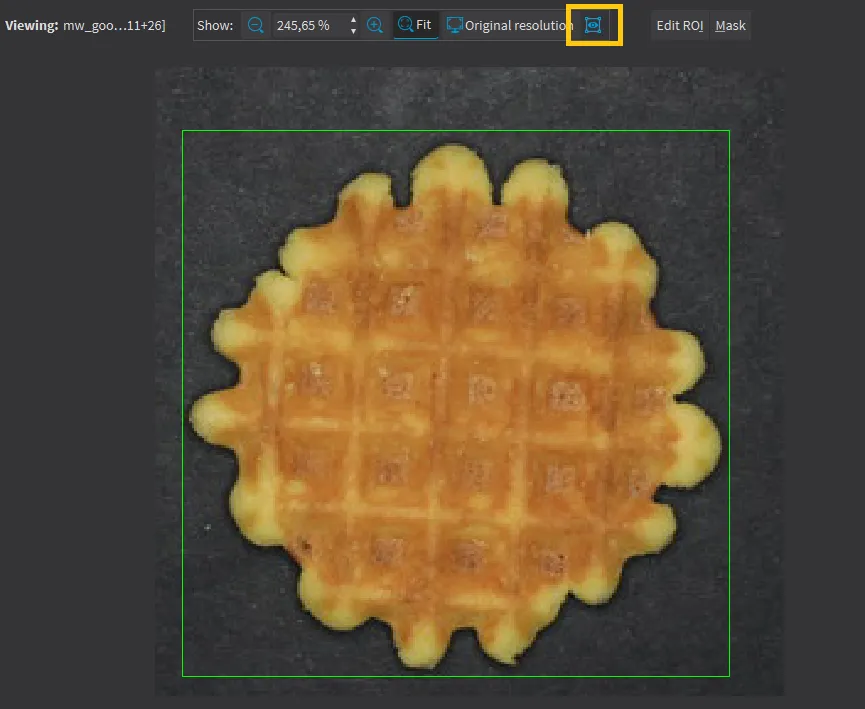
Visualize the ROI.
API: use
EDataset::SetRegionOfInterest.NET Python
Mask
Set a mask on an image in a dataset to remove the pixels in the mask area from any computation. The mask works as a “don’t care area”.
Deep Learning Studio
To change the mask:
Select an image from the dataset.
Click on the
Maskbutton (ALT+M).
Mask edition. Select a drawing tool to draw the mask.

Mask edition tools. Draw the mask.
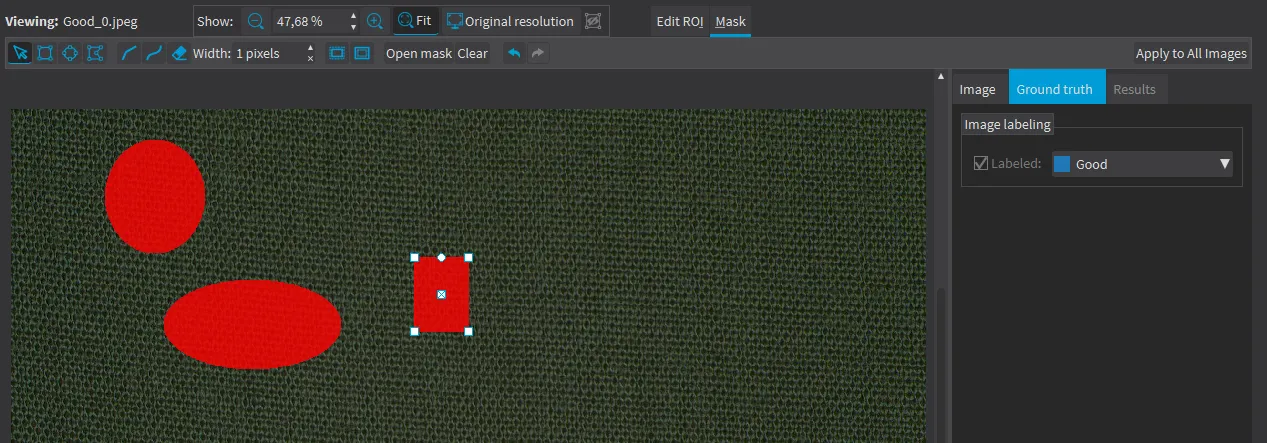
Exemple of mask. Note
Click on the Open mask button to use an image to specify a mask. All the pixels of the image (such as an
EROIBW8) that are over 127 are considered as part of the mask.
To set the same mask for all the images of the dataset:
Specify the mask for one of the images.
Click on the
Apply to All Imagesbutton (CTRL+SHIFT+A).
Apply the mask to all images.
API
Specify the mask when you add the image to the dataset.
Or use
EDataset::SetMask.NET Python.
Annotating the Ground Truth of an Image
Images can have three types of annotation:
Ground truth image label
Ground truth segmentation
Ground truth objects
Each type of annotation has its own label list:
The image labels represent a characteristic of an image and its content. Use them to annotate images for EasyClassify or EasySegment Unsupervised.
The segmentation labels represent a characteristics of pixels. Use them to annotate image pixels for EasySegment Supervised.
The object labels represent a characteristic of a region of an image delimited by a bounding box. Use them to annotate images for EasyLocate.
Annotation states
According to whether such an annotation is present, the images can have the following states:
Labeled or Unlabeled if the image is or is not associated with an image label.
Only labeled images are used to train an EasyClassify or an EasySegment Unsupervised tool.
In the API, use
EDataset::HasLabel.NET Python.
With or without segmentation if the image has or has not a ground truth segmentation.
Only images with segmentation are used to train an EasySegment Supervised tool.
In the API, use
EDataset::HasSegmentation.NET Python.
With or without object labeling if the image has or has not a ground truth objects.
Only images with objects are used to train an EasyLocate tool.
In the API, use
EDataset::HasObjectLabeling.NET Python.
We distingish various states for the ground truth annotation of an image:
The ground truth segmentation of an image has the following state:
Background when all the pixels of the image are associated with the
Backgroundsegmentation label.In defect detection applications, a background segmentation means that the image contains no defect.
With foreground blobs when the segmentation contains at least one pixel associated with a segmentation label different from
Background.In defect detection applications, a segmentation with foreground blobs means that the image contains defects.
In the API, use
EDataset::HasForegroundSegments.NET Python.
The ground truth object labeling of an image has the following state:
No objects when there is no object in the image.
In defect detection applications, an image with no object means that the image contains no defect.
With objects when there is at least one object in the image.
In defect detection applications, an image with objects means that the image contains defects.
In the API, use
EDataset::GetImageNumObjects.NET Python to determine if the image has objects or not.
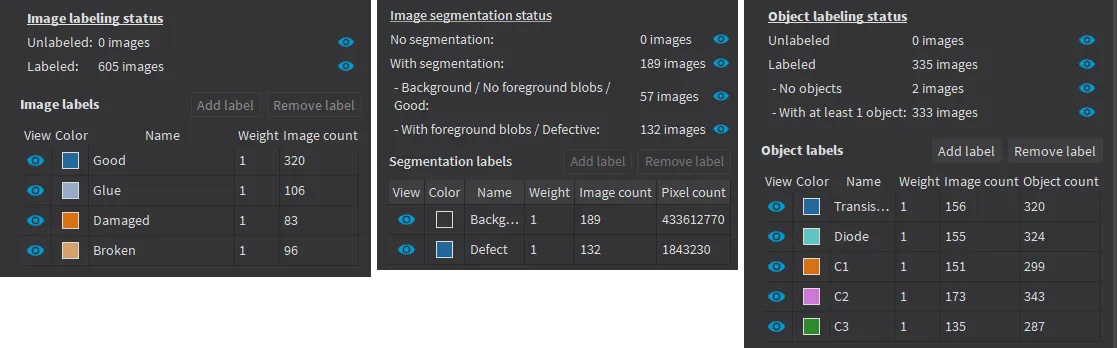
In Deep Learning Studio, the icons  (visible) and
  (hidden) represent the visibility state of the images with the corresponding state and/or image label in the image list. Click on these icons to toggle the visibility state.
Editing the Label of an Image
Deep Learning Studio
To change the label of images:
Select one or more images in the image list.
Right click on the selection.
Click on
Set labeland select the new label.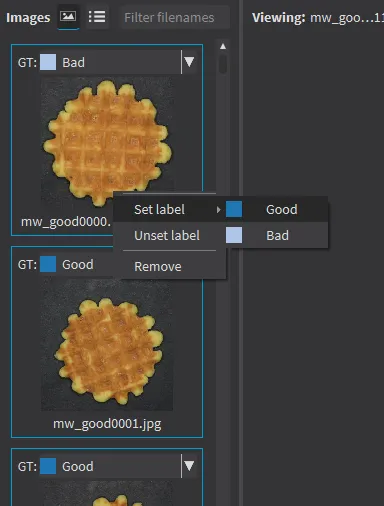
Set an image label to a set of images.
To change the label of a single image:
Click on the image in the list to open the image in the viewer.
In the
Ground truthtab on the right, select the new label.
Set an image label to an image.
Or use the keyboard keys F1 … F10 to assign the \(1^{st}\) … \(10^{th}\) label to the image.
API
Use
EDataset::SetImageLabel.NET Python to change the label of a single image or to a set of image files matching aglob pattern.
Editing the Segmentation of an Image
Deep Learning Studio
To initialize or reset the segmentation of an image to all
Backgroundpixels:Select one or more images in the image list.
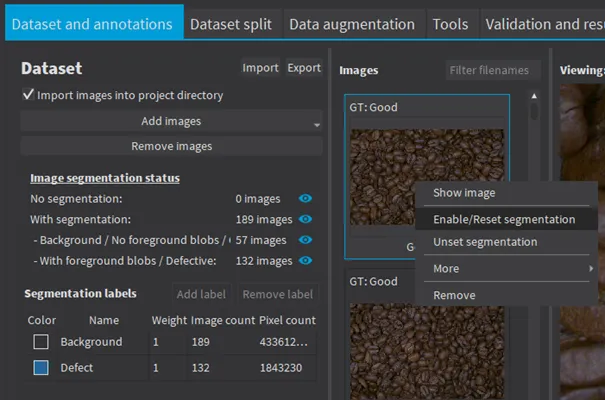
Initialize or reset the ground truth segmentation of an image.
Right click on the selection.
Click on
Enable/Reset segmentation.
To edit the segmentation:
Double click on the image to open it in the image editor.
Click on the
Segmentationbutton (ALT+S).
Accessing the edition tools for the segmentation. To enable or unset the segmentation, check or uncheck the
Segmentationcheckbox (CTRL+S).
Enable or unset the segmentation. Select a segmentation label, a drawing tool and enclose the segmentation.
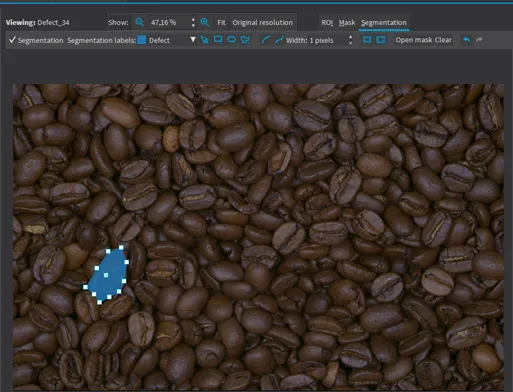
Segmenting the image with a drawing tool.
Change the segmentation label of a blob by right-clicking on it
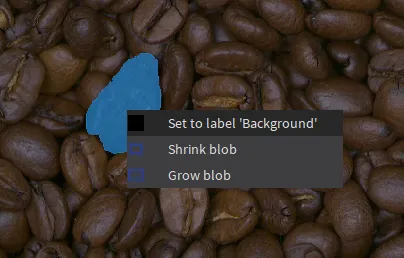
Changing the segmentation label of a blob.
The following drawing tools are available:

Rectangle: click and drag to create a rectangle.
Ellipse: click and drag to create an ellipse.
Polygon: click to create new vertices and double-click to close the polygon. When the polygon is closed, double click on an edge ton add a new vertex.
Assisted segmentation: click and drag to draw a rectangle around the zone you want to segment. To refine the segmentation, mark the pixels (click and drag) to include in the segmentation.
Lines: click and drag to draw a line with a pen of the specified width.
Free-form drawing: click and draw any shape with a pen of the specified width.
Eraser: same as free-form drawing but it assigns a background label instead of the selected segmentation label.
Shrink: shrinks the blobs of the selected segmentation label.
Grow: grows the blobs of the selected segmentation label.Except for the eraser tool, all the tools operate on the label specified in the segmentation tool bar.
API
Use
EDataset::UnsetSegmentation.NET Python to remove the ground truth segmentation annotation for an image.To create or modify the ground truth segmentation of an image:
Use
EDataset::ResetSegmentation.NET Python to reset the segmentation annotation of an image to its default (full background).Add foreground regions to the segmentation using
EDataset::AddRegionToSegment.NET Python where region is anERegion.NET Python.Use
EDataset::SetSegmentationMap.NET Python to set the segmentation of the image using a 16 bits image where the value of each pixel corresponds to the segmentation label index of that pixel.
Editing the Objects of an Image
Deep Learning Studio
To initialize or reset the object labeling of an image:
Select one or more images in the image list.
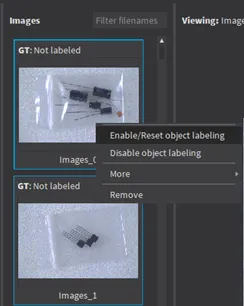
Initialize or reset the ground truth objects of an image.
Right click on the selection.
Click on
Reset object labeling.
To edit the objects:
Double click on the image to open it in the image editor.
Click on the
Objectsbutton (ALT+O).
Accessing the controls for editing the ground truth objects. To reset or unset the object labeling, uncheck the
Object labelingcheckbox (CTRL+L).
Initialize or unset the ground truth objects of an image. Click on the
Add objectsbutton to add new objects with the label indicated next to the button.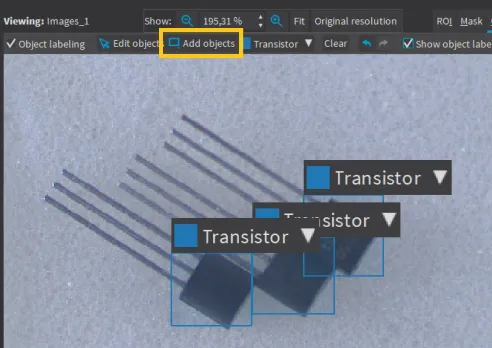
Adding ground truth objects.
Click on the
Edit objectsbutton to modify the label of an object and the bounding box or the position, according to the EasyLocate mode.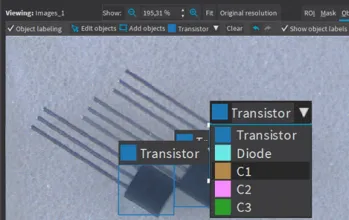
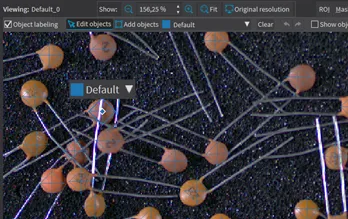
Editing ground truth objects.
API
Use
EDataset::UnsetImageObjectLabeling.NET Python to remove the ground truth object annotation for an image.To create or modify the ground truth object annotation of an image:
Use
EDataset::ResetImageObjectLabeling.NET Python to reset the object annotation of the image to its default (no object).Use
EDataset::AddImageObject.NET Python to add an object for an image.Use
EDataset::SetImageObject.NET Python to change an object for an image.Use
EDataset::RemoveImageObject.NET Python to remove an object for an image.
Importing Standard Dataset
Import dataset or annotations in a standard format:
COCO jsondataset for EasySegment Supervised and EasyLocate Axis Aligned Bounding Box annotations.A
COCO jsondataset is ajsonfile contains the annotation for several images.In Deep Learning Studio, use the
Importfeature to import aCOCO jsondataset.
Note
See https://cocodataset.org/#format-data for a description of the
COCO jsondataset format.The
YOLO TXTannotation format for EasyLocate Axis Aligned Bounding Box annotations.For each image, the annotations are in a file with the same filename as the image and the
.txtextension.The label of each bounding box is encoded through its ID. A label file mapping the label id to the actual label must be provided to import the annotations.
In Deep Learning Studio, if the annotation files are located in the same folder as their corresponding images, use the
Add imagesfeature to import the images and their annotations.With the API, use
EDataset::ImportYOLOTXTAnnotations(imgId, labelFile).NET Python to import the annotation for an image.
Note
See https://pjreddie.com/darknet/yolo for he original YOLO source code.
PASCAL VOC XMLannotation for EasyLocate Axis Aligned Bounding Box annotations.For each image, the annotations are in a file with the same filename as the image and the
.xmlextension.In Deep Learning Studio, if the annotation files are located in the same folder as their corresponding images, use the Add images feature to import the images and their annotations.
With the API, use
EDataset::ImportPascalVOCXMLAnnotations(imgId).NET Python to import the annotation for an image.
Note
See http://host.robots.ox.ac.uk/pascal/VOC for resources on the
PASCAL VOC XMLannotations.Check the available annotations for a file with
EDataset::GetAvailableImageAnnotationFormat(filePath).NET Python.