Drawing in Images
Introduction
Whenever relevant, the eVision tools provide methods
Drawto render their contents and/or configuration. This is, for instance, the contents of anEImageor the frame of anEROI.A given tool can have multiple methods
Draw, usually one for each feature available.The methods
Drawtake an objectDrawAdapteras their main parameter, and additional parameters for zoom and pan:Tool.Draw(EDrawAdapter* adapter, float zoomX, float zoomY, float panX, float panY);zoomXandzoomYare expressed in percentage, 1 is the default value and means no zoom.It can be different in the horizontal and vertical directions (which can be useful in the case of non-square pixels for instance).
If you don’t provide a vertical zoom, or set it to 0, it will be set identical to the horizontal one.
panXandpanYare expressed in pixels, but in image coordinates. It means that the value you pass topanXandpanYare multiplied by the corresponding zoom before being applied.
Example: How to draw an image and a ROI frame on a window under Windows:
EImageBW8 image;
EROIBW8 roi;
EWindowsDrawAdapter adapter(windowHdc);
image.Draw(adapter);
roi.DrawFrame(adapter);
Graphical interactions
You can configure some of the eVision tools graphically and use the provided methods to put your configuration in place.
Graphical Interaction-enabled tools provide special parameters to some of their methods
Drawto draw handles on the tool representation.To capture the user interactions with those handles, these tools also provide two specialized methods:
HitTestdetects if a handle is under the mouse when providing it with the current cursor coordinates. You typically use this test during a mouse button down event.Dragmoves the detected handle to the given coordinates. This in turn modifies the tool configuration to match the new handle position.Dragis typically associated with the mouse button up event.
Note
HitTestandDraguse the same zoom and pan parameters asDraw. You must set them the same way (with the same values) to achieve the desired result.Use
Easy::GetHandleSize.NET Python to change the handle size.This value influences the drawing and the hit area.
By default, the handle size is equal to 8 pixels.
Draw adapters
The draw adapters are objects that, in addition to representing the context in which to draw, provide methods to draw the selected primitives in that context.
They are initialized by providing the targeted context to the constructor.
Some of the drawing methods provided by the draw adapters are (but are not limited to):
EDrawAdapter::Line.NET Python /EDrawAdapter::Line.NET Python draws one or more lines on the contextEDrawAdapter::Rectangle.NET Python /EDrawAdapter::FilledRectangle.NET Python draws a rectangle, filled or not, on the contextEDrawAdapter::Ellipse.NET Python /EDrawAdapter::FilledEllipse.NET Python draws an ellipse, filled or not, in the contextEDrawAdapter::Text.NET Python /EDrawAdapter::BackedText.NET Python renders a text in the context, with or without backgroundEDrawAdapter::Image.NET Python renders an image in the context
For more information about the drawing primitives provided by the draw adapters, please refer to the reference documentation.
To set the color of the primitives, provide a pen and/or a brush and use the methods
EDrawAdapter::GetPen.NET Python andEDrawAdapter::GetBrush.NET Python.If you do not provide a pen and/or a brush, the default colors are used.
The set the font of the text, provide a font with the method
EDrawAdapter::GetFont.NET Python.
Standard draw adapters
eVision provides a set of off-the-shelf draw adapters that you can use in different situations:
EWindowsDrawAdapter.NET Python allows to draw on Windows systems. To draw on a window, provide the window’s HDC to its constructor, or, to draw in anEImagebuffer, provide thatEImage.It relies on GDI and GDI+ to provide its services.
This is the preferred way to draw on Windows.
QtDrawAdapterallows you to draw using Qt on a QPainter context. To draw on a QPainter context, provide the QPainter to the constructor, or, to draw on anEImagebuffer, provide thatEImage.You can use the
QtDrawAdapterboth on Windows and Linux.This is the preferred way to draw on Linux.
Note
QtDrawAdapteris using an external resource (namely Qt) and as such is provided as source code in its own header rather than in the global eVision header. For more information about external and custom draw adapters, see below.
EGenericDrawAdapter.NET Python is a draw adapter that can only render on anEImage, but it can do it in a consistent manner on all supported OSes.It is available on both Windows and Linux.
Drawing in an EImage
As said above, you can draw in an
EImage(usually anEImageBW8orEImageC24) by initializing a draw adapter with that image and using either the eVision methodsDrawor the draw adapter drawing primitives:
EImageBW8 image;
EMatrixCode code;
EWindowsDrawAdapter adapter(image);
code.DrawPosition(adapter);
Custom draw adapters
If you require a draw adapter to render in a specific, unsupported type of context (for ex. a DirectDraw surface, an OpenGL context…), you can build your own draw adapter by deriving from the interface
EExternalDrawAdapter.NET provided by eVision and implementing all the required methods.Once this work is done, you will be able to use your new, custom draw adapter in the same way as the off-the-shelf ones, taking advantage of eVision methods
Draw.The provided
QtDrawAdapteris a draw adapter built using that mechanism, you can use it as a reference on how to build a custom draw adapter. The sources of theQtDrawAdapterare bundled with the Qt Samples.
Enhanced Image Display
When the enhanced image display mode is enabled, a high-quality interpolation method is used to display the resized images.
Set
Easy::SetEnableEnhancedImageDisplay.NET Python toTRUE, to enable the enhanced image display.By default, this option is disabled.
Enhanced image display has a significant impact on display speed, the drawing can be 4x to 10x slower.
The drawing of images with
EBW8VectororEC24Vectorused as Look Up Table doesn’t support enhanced image display
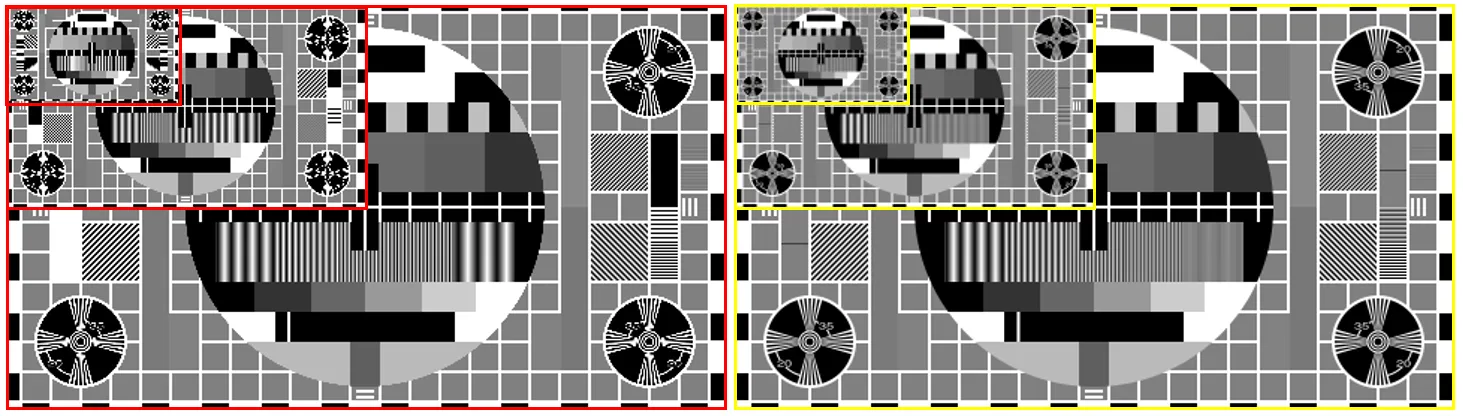
EnhancedImageDisplay disabled (left) and enabled (right)
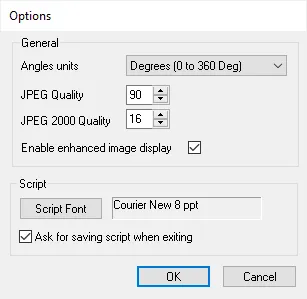
eVision Studio exposes this option in
View>Optiondialog: