Non-Linear Filtering
These functions use non-linear combinations of neighboring pixels to highlight a shape, or to remove noise. Most functions can be applied in-place (except top-hat and median filters) i.e. the source image is overwritten by the destination image.
All have a gray image and a bi-level equivalent, for example EasyImage::ErodeBox .NET Python and EasyImage::BiLevelErodeBox .NET Python.
To apply the non-linear filtering operation, a kernel is defined. A kernel is defined as a 2D matrix. They slide this Kernel over the image to determine the value of the destination pixel when a match is found:
Erosion, Dilation: shrink (erosion) or grow (dilation) regions.
Opening, Closing:
Opening removes small foreground protrusions and smooths boundaries.
Closing fills small holes/gaps and smooths boundaries.
Thinning, Thickening: reduce shapes toward their skeleton (thinning) or expand them (thickening) using pattern-based rules.
Top-Hat filters: preserve small details/features while suppressing the broader background trend.
Morphological distance: measures how many erosions are needed before a pixel becomes background (black).
Morphological gradient: highlights edges by combining dilation and erosion results (inner/outer edge information).
Median filter: removes impulsive (“salt-and-pepper”) noise by replacing each pixel with the median of its neighborhood.
Hit-and-Miss transform: detects specific foreground/background pixel patterns; can be used for pattern detection and skeleton-related operations.
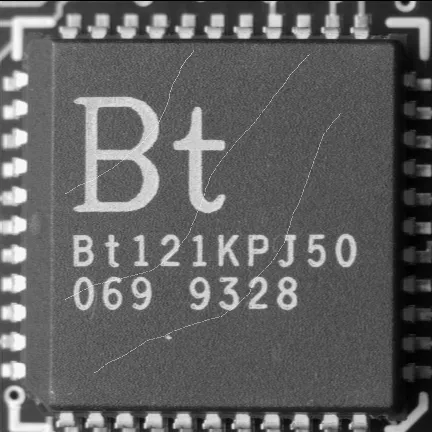
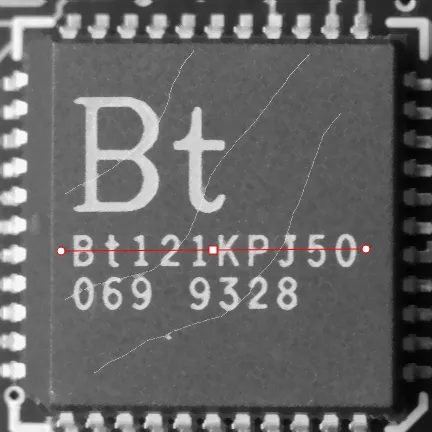
Examples throughout this page use the following image as input:
Kernel
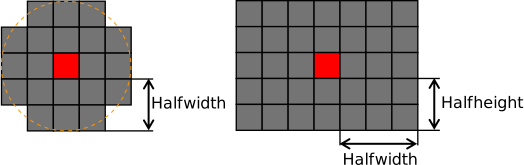
The morphological operators combine the pixel values in a neighborhood of given shape (square, rectangular or circular) and replace the central pixel of the neighborhood by the result.
Three special cases are most often used erosion, dilation and median filter where : K can be 1 (minimum of the set), N (maximum) or N/2 (median).
Erosion, Dilation, Opening, Closing, Top-Hat and Morphological Gradient operations all use rectangular or circular kernels of odd size.
The kernel size has an important impact on the result.
Some dimension examples:
|
Actual |
|---|---|
0 |
1 |
1 |
3 |
2 |
5 |
3 |
7 |
Erosion, Dilation
Erosion reduces white objects and enlarges black objects, dilation does the opposite.
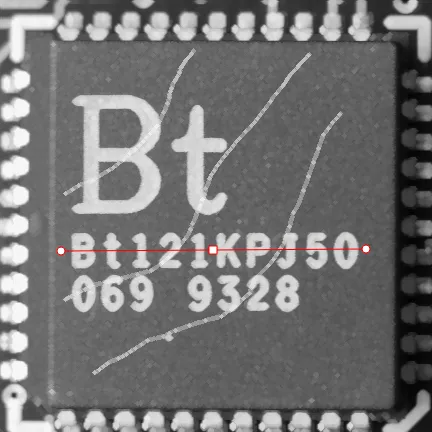
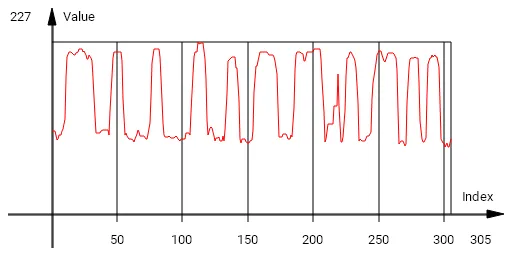
Erosion thins white objects by removing a layer of pixels along the objects edges:
EasyImage::ErodeBox.NET Python,EasyImage::ErodeDisk.NET Python. As the kernel size increases, white objects disappear and black ones get fatter.Dilation thickens white objects by adding a layer of pixels along the objects edges:
EasyImage::DilateBox.NET Python,EasyImage::DilateDisk.NET Python. As the kernel size increases, white objects get fatter and black ones disappear.
Opening, Closing
Opening removes tiny white objects / dust.
Closing removes tiny black holes / dust.
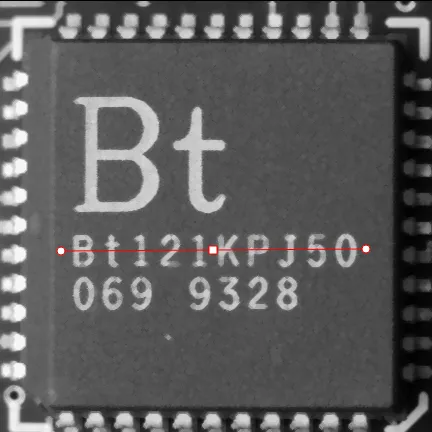
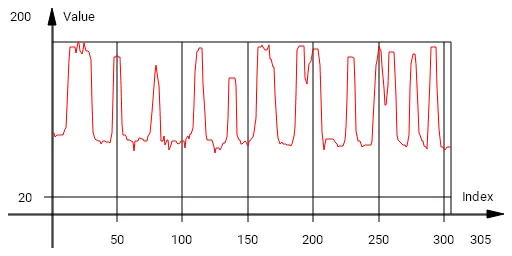
An Opening is an erosion followed by a dilation using
EasyImage::OpenBox.NET Python,EasyImage::OpenDisk.NET Python.The global effect is to preserve the overall shape of objects, while removing white details that are smaller than the kernel size.
A Closing is a dilation followed by an erosion using
EasyImage::CloseBox.NET Python,EasyImage::CloseDisk.NET Python.The global effect is to preserve the overall shape of objects, while removing the black details that are smaller than the kernel size.
Thinning, Thickening
EasyImage::Thick.NET Python andEasyImage::Thin.NET Python can respectively grow or remove pixels from a binary image:Thinning: can help edge detectors by reducing lines to single pixel thickness.
Thickening: can help determine approximate shape, or skeleton.
When a match is found between the kernel coefficients and the neighborhood of a pixel, the pixel value is set to 255 if thickening, or 0 if thinning. The kernel coefficients are:
0: matching black pixel, value 0
1: matching non-black pixel, value > 0
-1: don’t care
EasyImage::Thinning.NET Python computes the skeleton of a binary image without necessitating multiple iterations or a kernel. It uses the Zhang-Suen thinning algorithm.
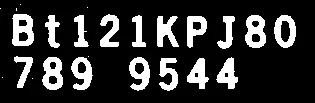
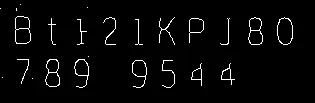
Result of the thinning operation, a 1 pixel-wide skeleton defining the overall shape of the input image.
Top-Hat Filters
Top-hat filters are excellent for improving non-uniform illumination.
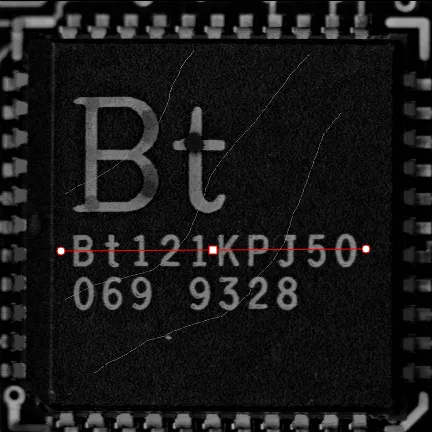
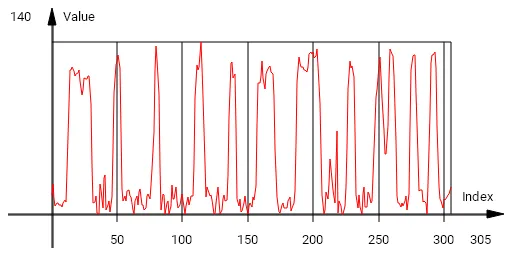
They take the difference between an image and its opening (or closure). Thus, they keep the features that an opening (or closing) would erase. The result is a perfectly flat background where only black or white features smaller than the kernel size appear.
White top-hat filter enhances thin white features:
EasyImage::WhiteTopHatBox.NET Python,EasyImage::WhiteTopHatDisk.NET Python.Black top-hat filter enhances thin black features:
EasyImage::BlackTopHatBox.NET PythonEasyImage::BlackTopHatDisk.NET Python.
Morphological Distance
EasyImage::Distance.NET Python computes the morphological distance (number of erosion passes to set a pixel to black) of a binary image (0 for black, non 0 for white) and creates a destination image, where each pixel contains the morphological distance of the corresponding pixel in the source image.
Morphological Gradient
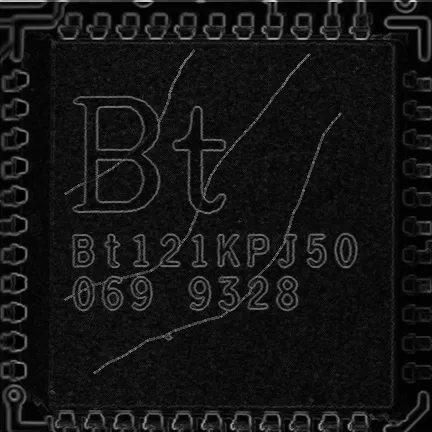
To get the morphological gradient, use EasyImage::MorphoGradientBox .NET Python or EasyImage::MorphoGradientDisk .NET Python
The morphological gradient performs edge detection, it removes everything in the image but the edges.
The morphological gradient is the difference between the dilation and the erosion of the image, using the same structuring element.
Median
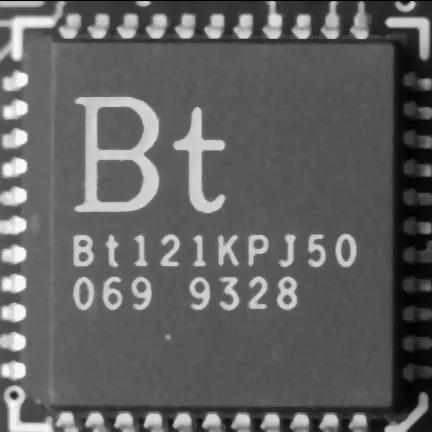
The
EasyImage::Median.NET Python filter removes impulse noise, whilst preserving edges and image sharpness.It replaces every pixel by the median (central value) of its neighbors in a 3x3 or larger kernel, thus, outer pixels are discarded.
Hit-and-Miss Transform
Hit-and-miss transform detects a particular pattern of foreground and background pixels in an image.
The EasyImage::HitAndMiss .NET Python function has three arguments:
A pointer to the source image of type
EROIBW8.NET Python,EROIBW16.NET Python, orEROIC24.NET PythonA pointer to the destination image of type corresponding to the type of the source image.
The sizes of the source and destination images must be identical.A kernel of type
EHitAndMissKernel.NET Python Two constructors are available for the kernel object:EHitAndMissKernel(int startX, int startY, int endX, int endY)where coordinates are relative to the kernel center (the current pixel):startX,startYare coordinates of the top-left corner of the kernel, must be ≤ 0.endX,endYare coordinates of the bottom-right corner of the kernel, must be ≥ 0.The resulting kernel dimensions are: \(\text{width} = \text{endX} - \text{startX} + 1\), \(\text{height} = \text{endY} - \text{startY} + 1\)
EHitAndMissKernel(unsigned int halfSizeX, unsigned int halfSizeY)where the kernel is centered on the current pixel:halfSizeXis the kernel half-width: \(\text{halfSizeX} = (\text{width} - 1) / 2\), must be greater than zero.halfSizeYis the kernel half-height: \(\text{halfSizeY} = (\text{height} - 1) / 2\), must be greater than zero.The resulting kernel dimensions and origin are:
\(\text{width} = 2 \times \text{halfSizeX} + 1\), \(\text{height} = 2 \times \text{halfSizeY} + 1\)
\(\text{startX} = -\text{halfSizeX}\), \(\text{startY} = -\text{halfSizeY}\)
Here’s an example: the hit-and-miss transform can be used to locate corners.

Binary source image.
Define the kernel by detecting the left corner. The left corner pixel has black pixels on its immediate left, top and bottom; and it has white pixels on its right. The following hit-and-miss kernel will detect the left corner:
  - +
- + +
  - +
Apply the filter on the source image. Note that the resulting image should be properly sized.

Resulting image, highlighted pixel is located on left corner of the square.
Locate the three remaining corners in the same way. Declare three kernels that are the rotation of the filter above and apply them.


See Also
Easy to understand, ready to copy code snippets.
Conceptual guide to spatial and temporal noise reduction techniques.