EChecker - Validating Golden Templates
EChecker .NET Python is a tool that allows you to inspect an image using a Golden Template validation. It works in 2 steps:
The Model Creation involves preprocessing one of several reference images to compute a model. You can create the model once and save the results in a Golden Template model for later use.
The Inspection involves processing an image and checking its quality using the previously computed model. These 2 operations are totally independent and can be programmed in separate applications.
The following sections present the relevant API functions for use in the training and inspection steps.
EChecker vs. Legacy::EChecker2
EChecker .NET Python supersedes the original eVision::Legacy::EChecker2 .NET Python (which itself superseded eVision::Legacy::EChecker .NET Python):
It expands
eVision::Legacy::EChecker2.NET Python with an up-to-date API usingEFrame.NET Python and easy to integrate to the eVision Studio workflows.It delegates the alignment part to the calling application, allowing for greater flexibility when aligning.
For all these reasons, the original eVision::Legacy::EChecker2 .NET Python is now considered legacy and deprecated.
Creating a Model
During the model creation phase, the good images are processed to build the model that is used in the inspection phase. The model includes the pixel acceptance ranges, in the form of 2 threshold images, as well as the information needed to normalize the images and the region to inspect.
The EChecker::Train .NET Python method creates the model. This method takes the frames to align all the images on a common reference as input, so the alignment part must be handled first.
External Alignment
Hint
If your images are sufficiently aligned, you can skip this step.
EChecker needs to know where the object to inspect lies in the image.
Use an
EFrame.NET Python that indicates a referential for each training or inspection image.Define the inspection region in that frame.
You can use an
EPatternFinder.NET Python or anEMatcher.NET Python to directly detect the frame or you can use a combination of severalEFoundPattern.NET Python.
There are 2 EChecker samples in eVision Studio:
In the first sample, an
EPatternFinder.NET Python retrieves the frame by finding the text to inspect (the text is not at a fixed position on the chip, so the chip itself cannot be used as a frame).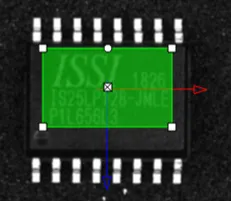
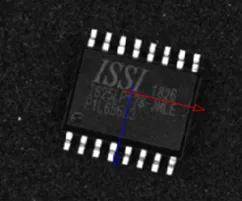
Left: the inspection region on the first training image defined in the reference frame
Right: the reference frame on an inspected image¶In the second sample, the frame is obtained by finding 2 fiducials, drawing a line between them and applying a fixed rotation so that the reference frame is horizontal.
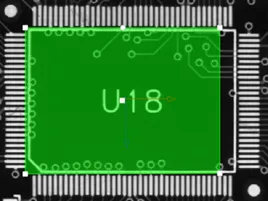
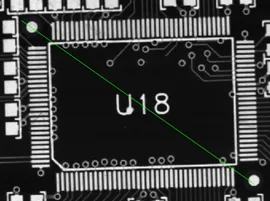
Left: the inspection region on the first training image defined in the reference frame
Right: the reference frame on an inspected image
Training on Multiple Images
After the alignment setup, the main training phase begins.
All the training images are processed and are averaged using statistical training (see below).
The training uses realignment to deal with displacement of the inspected part in the field of view.
The training uses gray-level normalization to deal with global illumination changes.
Ideally, use 16 images or more in training to create the low and high threshold images that serve as the basis of the inspection process.
Statistical Training
Use several training images to build a statistical model of normal gray-level variations and establish acceptance ranges. All submitted images must be correctly aligned so that variations in gray levels come only from noise and normal part-to-part differences, not from geometric transformations.
Consecutive images of the same part capture the noise distribution, the inherent camera and lighting fluctuations.
Consecutive images of different defect-free parts capture normal part-to-part variations due to manufacturing tolerances and material properties.
Training images should cover the expected range of real-world conditions (lighting variations, part geometry spread, etc.) so that detected defects represent genuine anomalies rather than normal variation.
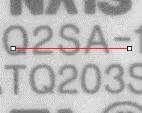
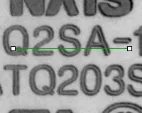
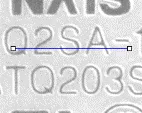
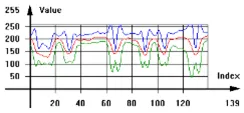
Accepted gray-level ranges.
Model Creation Parameters
Choose the training mode .NET Python to fit your needs:
Quick.NET Python for a quick training process and simpler cases (well defined defects and stable illumination).
Set the normalisation mode .NET Python to select the type of normalization used by EChecker:
NoNormalization.NET Python: if your acquisition process already produces consistently lit images.By default, the
Moments.NET Python normalization mode is used.
Set the inspection tolerance .NET Python to adjust the acceptance ranges during the inspection.
Use higher values to make the inspection process more tolerant to noise and/or texture.
Note
All these parameters have an influence on how the model is built, and, as such, if any of these parameters is changed, you must restart the model creation.
Training on a Single Image
Although EChecker often needs several training images, in simple cases, you can use only one with specific tolerance thresholds with the method EChecker::TrainOnSingleImage .NET Python. This method accepts a pixel if it is between \(p - G\) and \(P + G\), with \(p\) the smallest pixel in a geometricMargin vicinity, \(P\) the biggest pixel in a geometricMargin vicinity and \(G\) the value of the parameter grayLevelTolerance.
In this mode EChecker::SetInspectionTolerance .NET Python and EChecker::SetTrainingMode .NET Python are ignored but EChecker::SetNormalizationMode .NET Python still applies.
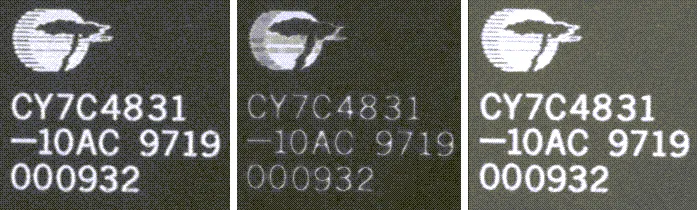
Left: the training image
Center: the low threshold image with a geometric margin of 2
Right: the high threshold image with a gray level margin of 30
Model Serialization
After the training, use the methods Save .NET Python to save the created model in a single file including all the relevant information and Load .NET Python to retrieve it.
Inspecting an Image
Use the inspection on an image to assess it against the trained model. The process is straightforward:
The sample image is realigned with the model.
The gray-level is normalized.
This gray-level is combined with the high and low threshold images to populate an
ECodedImage2.NET Python.The computed blobs are made of pixels that fall out of the range defined by the threshold images and thus represent potential defects.
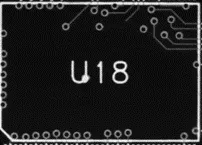
The realigned image.
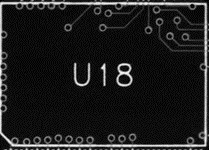
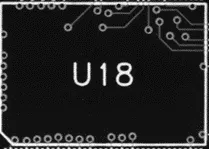
The low and high threshold images.
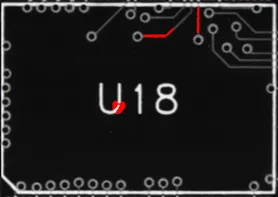
Detected defects after inspection.
When the inspection is done, you can discard the smaller defects (usually noise), as well as measure the geometric characteristics (location, size, orientation…) using the standard EasyObject processes.
To perform the inspection, use the method
EChecker::Inspect.NET Python.As for
EChecker::Train.NET Python, if an alignment is needed, first extract the frame of the fiducial (s) from the image.
Quick Links
Easy to understand, ready to copy code snippets.
Using EasyFind to correctly align images before detection and inspection.
Using EasyMatch to correctly align images before detection and inspection.
See also
Some eVision Studio samples illustrate several aspects of the EChecker tool:
Checker without Alignment: Checks defects on printed characters that are already aligned. The training is based on
TrainOnSingleImage, a single image and tolerance thresholds are used instead of several representative images. This sample relies on the EasyObject library.Checker with Basic Alignment: Checks defects on chips after alignment with a pattern finder. This sample relies on the EasyObject and EasyFind libraries.
Checker with Advanced Alignment: Checks defects on pcbs after alignment of 2 fiducials with 2 pattern finders. The 2 fiducials are then combined to form a frame. This sample relies on the EasyObject and EasyFind libraries.