Working with a Region
In some cases, most often to decrease the processing time or to single-out the object you want to analyze, you do not want to process the whole image but only a part of it.
You can define and use regions of interest (ROI) to restrict the area processed with your vision tool.
In eVision:
See also
For more details on ERegions, see Arbitrarily Shaped ROI (ERegion).
Hint
An ERegion is an arbitrary shape. If you want to use a simple rectangular ROI attached to an image, consider Step 3: Managing an ROI:.
Process
1. Draw the ERegion
Though it is not required, it is often easier to draw the ERegion based on an actual image:
Add an image tool.
Open an image representative of your setup.
See also
2. Add a Region Editor Tool:
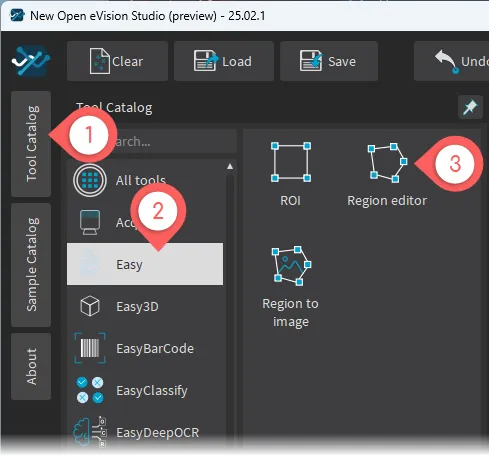
Tool CatalogEasy collectionRegion editor tool:The
Region editortool is added to the graph.
3. Connect the Source Image:
This is only required if you are using an image as input to help drawing the region.
Connect the
Image filetool to theRegion editortool and select aLink typefor this connection.
4. Draw your Region:
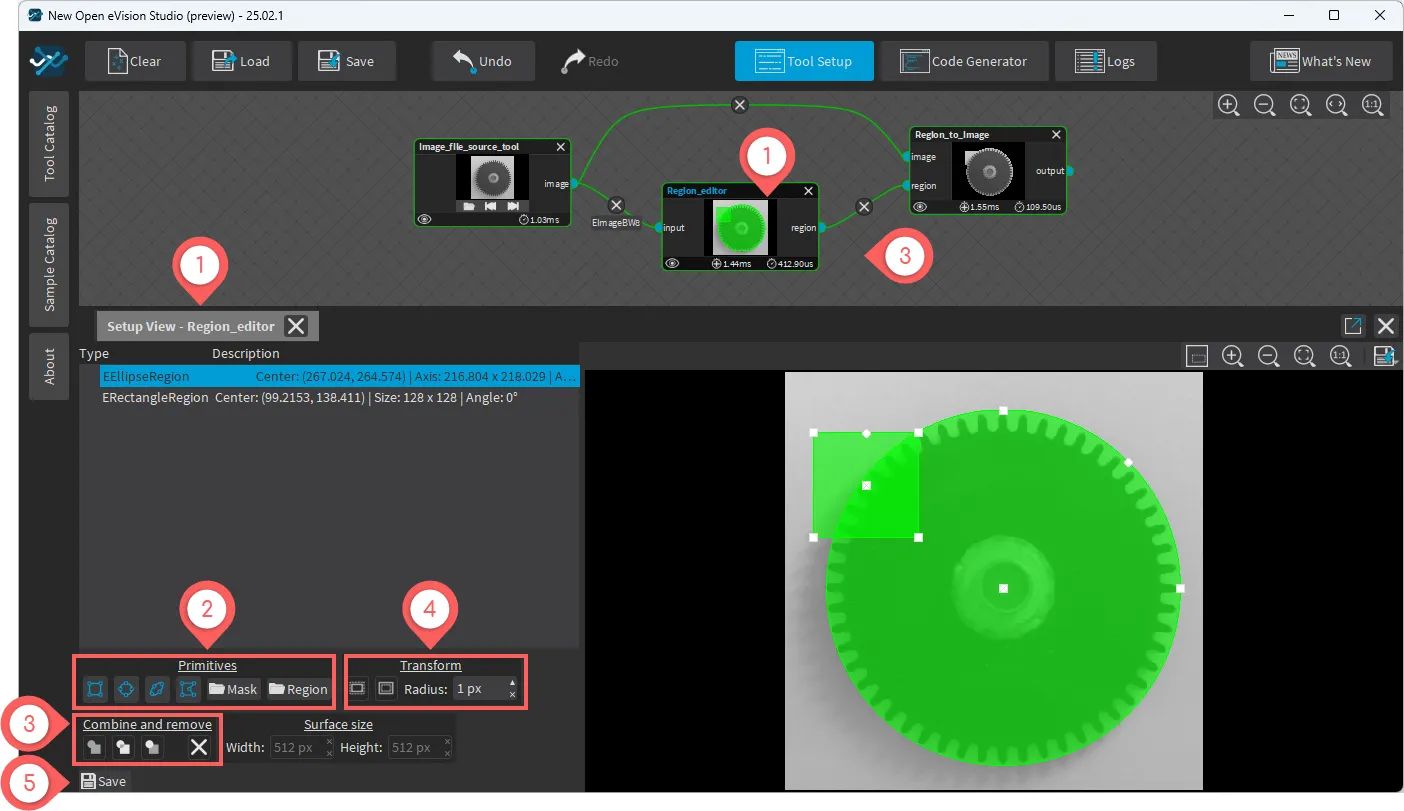
Setup View of the Region editor toolUse add
Primitivesbuttons and, using your mouse, move and adjust the shapes.
Combine and remove shapes:SHIFT + click to select 2 shapes in the list.
Click on a button (merge, intersection or substract) to combine them.
Transform a shape:Select it in the list, set the Radius and click on the
Grow regionorShrink regionbutton.
Either in the same project or a different one.
Saveit first.Then
Loadit.
Hint
Don’t forget to link the tool by connecting your Region editor output region port to the input region port of another tool.